Followers

Showing posts with label Tutorial. Show all posts

Saturday, 3 March 2012

Docrafts Waterfall Card - A tutorial

Hiya!

I had an email from a lovely lady called Joy who saw a post I did a while back using a Docrafts Woodland Folk waterfall mechanism (see it here). As I said in the post, the instructions are pretty tricky to follow and Joy has asked me to show how I did it so I said I'd do a tutorial because photos are so much easier to follow than written instructions! In fact, after doing this I think a video would have been better but as I don't have that sort of technology at my disposal, a bezillion photos will have to do!

You have been warned! :-)

The pieces come in a die cut sheet like this:


You need to start with this piece that I will call the waterfall card.  It has three folds identified down the left hand side and then another for the fixing tab at the bottom.


Pop it out and fold across all four of these folds:


Fold it in half at the centre fold so that the patterned side is on the inside and turn it round so it looks like this:


Apply glue between the top two folds (I'm using a glue runner but any glue will do)....


You can see where I've applied the glue better in this piccie:


Pop picture A from the sheet and stick it in place, aligning the top of the picture with the centre fold in the waterfall card:


Now fold the waterfall card at the second crease like this:


... until picture A is face down:


Next pop out picture B, make sure it is the right way up....


Flip it over and lay it on top of picture A (which is now face down)....


Making sure the tops of the pictures are carefully aligned, use a pencil to mark where the waterfall card is folded in between.....


Do the same on the other side....


Use the markings to score a line across picture B:


Turn the picture over and fold it at the score line:


You're going to stick this picture to the back of the face down picture A:


Apply glue to the back of picture A....


and between the top two creases that are visible on the waterfall card:


Align the tops of the pictures and stick picture B in place:


Fold picture B in half so it looks like this:


Now we need to do the same for picture C... Pop it out and make sure it's the right way up.


Flip it over and align the top edge with the edge of (the face down) picture B....


Make pencil marks where the waterfall card is folded in between...


....and again on the other side.


Score between the marks....


....and fold the picture at the score line:


You're going to stick this to the back of picture B like you did before....
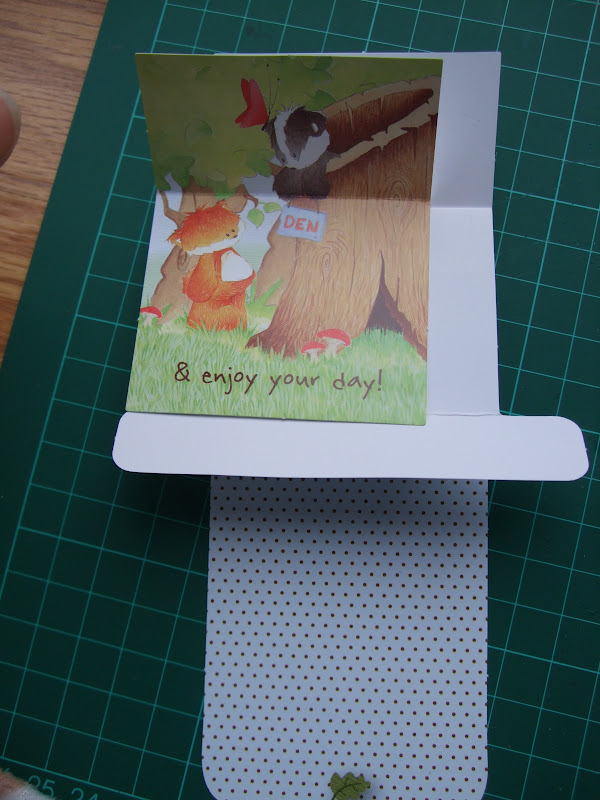

Apply glue to the back of picture B (ooops, piccie out of focus - sorry!)
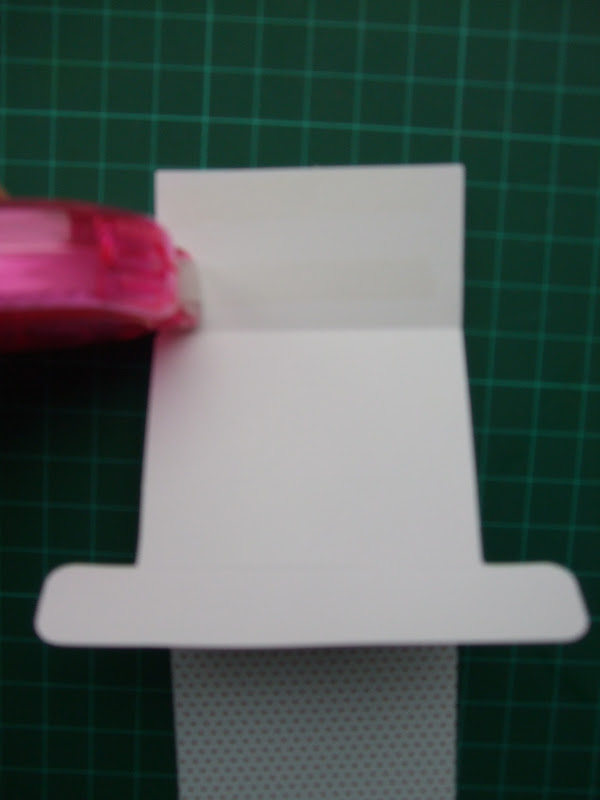

Align the tops of the pictures and stick it down....


Glue the fixing tab in place by applying a line of glue just above the score line:


Fold fixing tab and stick down...


Now apply glue to the rest of the waterfall card and the middle section of the fixing tab:


Stick down the rest of picture C....
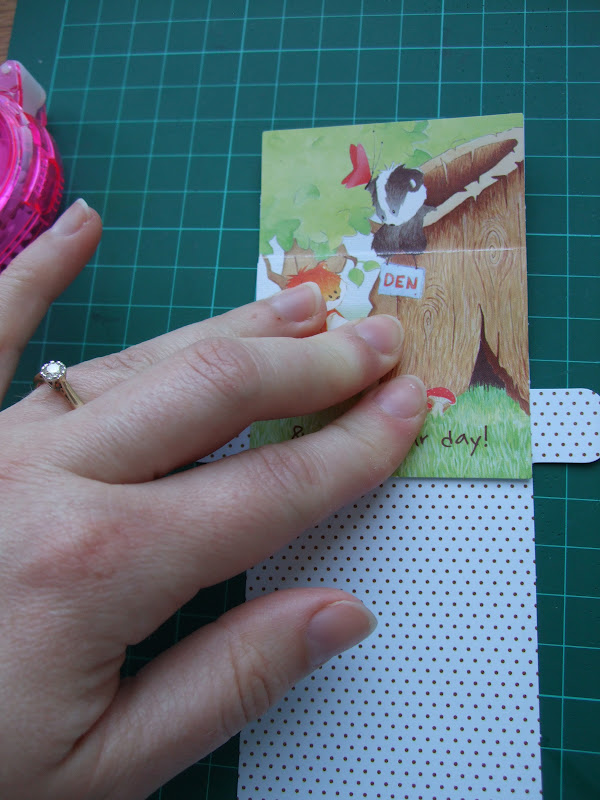

Now take the waterfall card and fold it across the middle at the centre fold so that all the piccies are visible. It should look like this:


You can now fix the waterfall to your card base. The best way is to use brads to hold the sides of the fixing tab in place (don't add glue to the back otherwise the mechanism won't be able to move). The brads are replaced in this picture by my children's fingers on either side :-)

Pull the middle tab (the acorn) downwards to work the mechanism:


Picture B becomes visible....


....and then....


....picture C....


Ta da! Sorry if this has been a bit a lot long winded with a million steps and pictures but I didn't design the thing! :-) Hopefully it all makes sense. If you want anything explaining please let me know.

Joy, please send me a piccie of your finished waterfall cos I'd love to see it :-)

Now go and enjoy a well-deserved cuppa after surviving the longest tutorial the world has ever known!

Love 'n' hugs,

Sunday, 8 January 2012

Dream Valley Challenge 23 - Anything goes: My wedding invitations

Hiya!

Well that didn't exactly go to plan, did it? I had (still have....) all these Christmas cards to show you and I haven't had five minutes to myself to add them to my blog, nevermind visit everyone else's!  So here it is, my first blog post of the year so I thought I'd make it a special one.  Not only is this for Dream Valley's first challenge of the year (which is ANYTHING GOES as it happens....) but it is also my opportunity to show you my wedding invitations and my very first tutorial! I hope you're prepared for a lot of photos....

I needed two versions for the wedding and the evening reception.....


The decorative corner is cut from some beautiful pearlescent champagne coloured paper I got from ebay. I'm afraid I can't tell you exactly what the die is cos I borrowed it from a good friend of mine but if anyone really wants to know I'll go back to her and try to find out for you.... You've seen the punched butterflies a million times before on my cards but this is the reason I originally bought the punch!  The wording stamps are from Papermania.

And then when you open it out......


A blogging pal was looking for a template for a tri-fold pocket card and I joined the hunt and became so cross that I couldn't find one that I decided to make my own..... I grew to love the design so much I decided they just had to be the format for my invites.  Now being a bit tight (perhaps that should be thrifty.... or careful....) I've designed these to be cut from one sheet of A4 each as you will see below (if you haven't lost the will to live before you get there!)

I had so much trouble finding some beautiful decorative scrolls and accents to add to my inserts that in the end I approached the lovely Lynne at Sentiments 4 You and she designed this beautiful set just for me - isn't she a sweetie!  I've printed the wording onto the same champagne coloured pearlescent paper I used on the front.


The little pocket contains tags with all the little bits of information my guests need - directions, accommodation information, gift info and the RSVP card in its own little envelope :-) I decorated the pocket with the antique gold pearlescent paper I had used as a matt for the wording and the butterflies on the front. A pain in the bum to do but worth it!


Paul and I have been together for years so we don't need any pressies so instead we're having a wishing well. If you're not familiar with the idea, your guests can throw some pennies into the wishing well instead of buying a present and make a wish for you instead. There are loads of wishing well poems out there but I couldn't find any that said exactly what I wanted to say, so instead I pinched bits from several and made up my own.  You should be able to read it if you click on the piccie and enlarge it....


When you fold it all up it looks like an envelope at the back so I added a little envelope seal to keep it all intact....


So here's the tutorial bit.....

Start with your piece of A4 card in the landscape orientation.

The measurements starting top RIGHT and moving across to the left are 1cm, 10cm, 10.2cm, 4cm.

Repeat those measurements 14cm down the page.

Make the envelope flap by measuring 6cm out from the point halfway down the left-hand vertical line (7cm down)


The pocket is the tricky bit. Continue the two right-hand vertical lines another 6cm down the sheet. Between these lines you need to form the v-shape to make your pocket. I found the easiest way was to locate the centre of the right-hand panel (this is 6cm from the right-hand edge of the card) and measure down 4.5cm.  Add 1cm wide flaps to each side of the pocket as shown and then trim away the excess card.


Score and fold either side of the central panel, the base of the right-hand panel and the flaps on the pocket.....


If you want to decorate the right-hand panel, I would do that now before you stick the pocket in place.

IMPORTANT: Check the folding of your card is straight. The extra 0.2cm on the middle panel allows room for the pocket when folding so it is all aligned. If, when you fold it, it isn't quite square, cut a tiny way into the line between the pocket and the right-hand panel from the left-hand flap and tuck the flap in a little tighter. This seems to rectify most problems.....

Fix the pocket in place....


Check the folding of your card and decorate as you wish!


I hope that all sounds quite straight forward. It wasn't that hard really, once I'd figured out the measurements that worked. If I haven't explained myself very clearly, try enlarging the piccie with the measurements on it or feel free to ask me any questions. And please, if you have a go, let me know so I can pop over and have a nosey :-)

I'm entering this into the Anything Goes challenge over at CES challenges.

Anyway, if you've made it this far I'm impressed! And thank you! Hope I haven't bored you to tears :-)

Now please do remember to pop over to Dream Valley and join in with our ANYTHING GOES challenge and see what all my fab teamies have made and I PROMISE to go visiting all your blogs very soon.

Love 'n' hugs,